26 Nov 2013
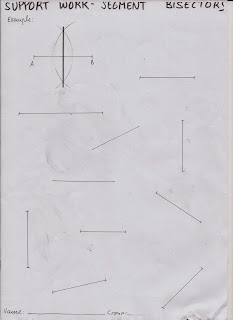
SUPPORT-(Reforç) BISECTORS-PARALLELS
Labels:
angle bisector,
geometry,
parallel,
reforç,
segment line bisector,
SUPPORT WORK
25 Nov 2013
Some more examples of Parallel in Art
Labels:
aboriginal,
art,
creation,
paintings,
parallel
Piet Mondrian and parallel lines, parallel lines and Mondrian.
SUPPORT WORK
You can practise some more with those exercises. Have fun!.
Want to BISECT ONLINE? Let´s play this game.
Labels:
angle bisector,
geometry,
segment line bisector
24 Nov 2013
DRAWING PARALLEL LINES
DRAWING PARALLEL LINES
WHAT to do? To draw some parallel lines, according to different angles.
WHERE to do it? On a thick DIN A-4 sheet.
HOW to do it?
(All parallel have to be 1 cm distance from others)
Pay attention to precision and cleanliness: speed kills!)
FORGOT HOW TO SET THE RULERS? Watch this short
video:
http://www.youtube.com/watch?v=pRPa2JGiZL0 (right handed people)
http://www.youtube.com/watch?v=zsln2MCd-UU (left handed people)
WHAT to do? To draw some parallel lines, according to different angles.
WHERE to do it? On a thick DIN A-4 sheet.
HOW to do it?
- Divide your paper into four equal rectangles. Since we do not fold the paper, measure both sides (length and width) and divide them (mathematically) into halves. We do not fold the paper.
(All parallel have to be 1 cm distance from others)
- First rectangle (left, up): Draw HORIZONTAL parallel lines. Please keep the distance.
- Second rectangle (right, up): Draw VERTICAL parallel lines: they are perpendicular to the latter.
- Third rectangle (left, bottom): Draw a 45º angle (it´s twice on your set-square). Start drawing 30º parallel lines to the frame. (To keep the distance check it on the quiet ruler, and not on the frame.)
- Fourth rectangle (right, bottom): Draw a 30º angle (it´s twice on your 30º-60º set square). Draw parallel lines to this angle. (To keep the distance check it on the quiet ruler, and not on the frame.)
- Self-correct: check every line (including the frame and angles) with your rulers.
- Overline every line with a thin black marker.
Pay attention to precision and cleanliness: speed kills!)
FORGOT HOW TO SET THE RULERS? Watch this short
video:
http://www.youtube.com/watch?v=pRPa2JGiZL0 (right handed people)
http://www.youtube.com/watch?v=zsln2MCd-UU (left handed people)
Labels:
30º parallel,
45ª parallel,
horizontal,
overline,
parallel,
self-correct,
vertical
THE NAMES OF INSTRUMENTS
THE NAME OF INSTRUMENTS - freehand drawing
WHAT to do? To draw freehand (without rulers) all your instruments.
WHERE to do it? On a thick DIN A-4.
HOW to do it?
- Lay your instruments on the table.
- Observe their shape and size: you need to fit them all on your paper.
- Draw a sketch first, and check their shape, size and proportions.
- Pay attention to both set squares: they look alike but in fact they´re very different!
- Once you have drawn them, overline them with a marker.
(You can add some colour on your work, but the target is FREEHAND DRAWING)
OUR MATERIALS
Here´s the list of all materials required:
RULERS: long straight ruler, 45º and 30º-60º set square.
COMPASS: one compass. Please write your name and group on it!
NOTEBOOK: one DIN A-4 notebook (for writing and sketching). It must have WHITE pages.
WORKBOOK: one DIN A-4 workbook (THICK paper). It´s used for definite works (those to be corrected)
PENCILS: one soft (0B, 1B, a.s.o.) and one hard pencil (4H, 5H,a.s.o.)
MARKERS: 0,2-0,4-0,8 mm black markers. (NOT permanent marker)
Some colours you have at home (wax, wooden crayons or markers) are welcome.
You also need a FOLDER to keep your work in. You MUST leave it in the classroom.
You can leave your tools (compass, rulers…) also. There is a safe place for them.
EVERY MATERIAL MUST HAVE YOUR NAME WRITTEN.
Labels:
30º-60º set square,
45º set square,
compass,
geometry,
materials,
ruler
Subscribe to:
Comments (Atom)


.jpeg)


.jpeg)
.jpeg)
.jpeg)
.jpeg)
.jpeg)
.jpeg)
.jpeg)
.jpeg)
.jpeg)


